
i spent 11 weekends building a live edge coffee table in singapore. it’s nice having handcrafted items, especially in this day of age of fast-everything. it makes it even more valuable when it’s something you had spent time and energy on (i.e. making it yourself).
but, should you do it?
here’s my honest review: do it if you’re ready for commitment, sweat, and making-do.
i penned down a 10-part series (link to the first part here) on instagram about this whole process, coupled with some pictures that i took along the way. if you’re looking for a summarized piece, feel free to read that version instead.
given the countless hours i had spent on the table (objectively, it was 55 hours of work per the calendar — but trust me, it felt like forever), here’s a longer form of the whole process. honestly, i just want to document it, and put pen to paper about some learning points and reflections i’ve picked up along the way. so here it goes.
some context: Singapore, the garden city
Singapore is called The Garden City. our roads are lined with trees — plenty of trees. once in a while, i’d see landscaping companies pruning these trees, sometimes even felling them (i.e. the full removal of the tree). i guess the trees are removed for reasons such as space repurposing, disease, or just general upkeep. but, where exactly does the wood go? it’s always been a thought at the back of my mind.
googled hard enough and found some companies that are already in the business of salvaging these trees in singapore. shoutout to Roger and Sons and also The Art of Suar Wood — just two of the companies who have written about their processes and their stories of salvaging our singapore wood. and i was just lucky enough to get a tour with Meng Hong at The Art of Suar Wood, sometime in March 2026.
looking around his workshop, there are slabs of all sizes. he went through the different steps that his team takes to transform the green wood to the final product. it’s tedious work:
fell the tree & transport it to the sawmill
work with sawmill to process the trees — depending on how you mill the wood/trunks, the grains on the slabs will appear differently
dry the wood slabs out (mind you, it takes years)
discuss with the customer on design expectations: shape, color, size, etc
process the table per design requirements
transport to customer’s home, assemble it
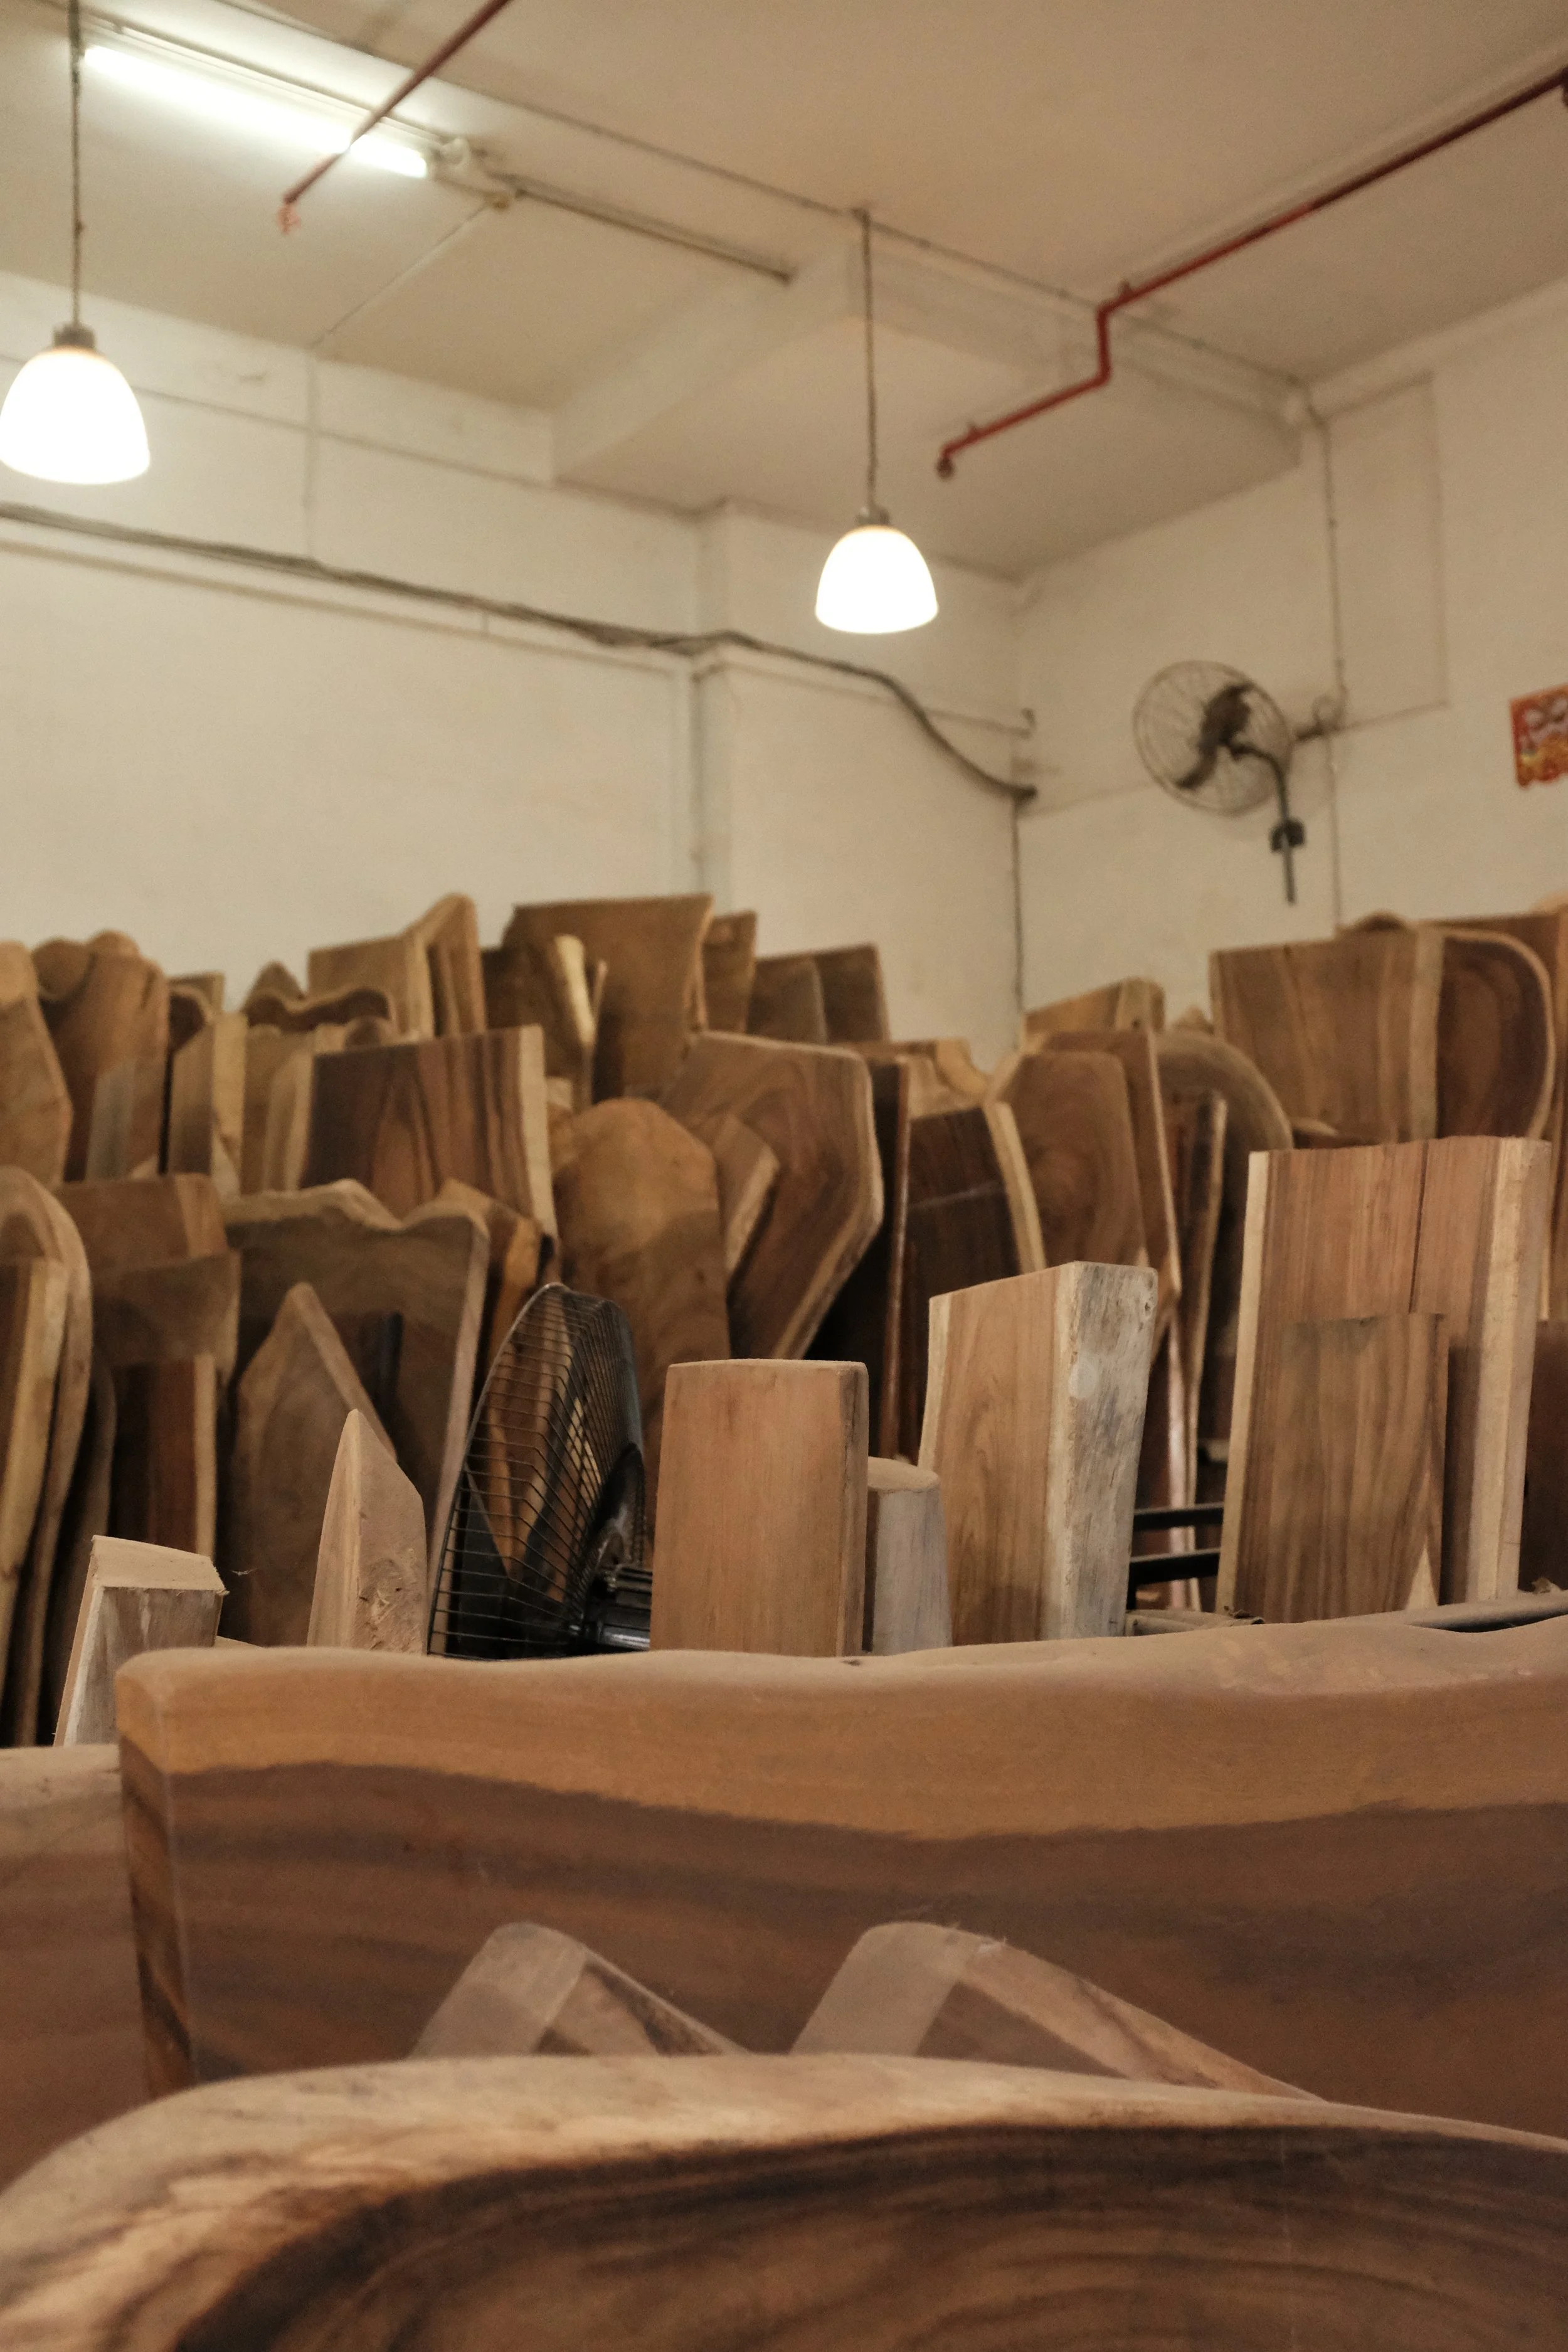
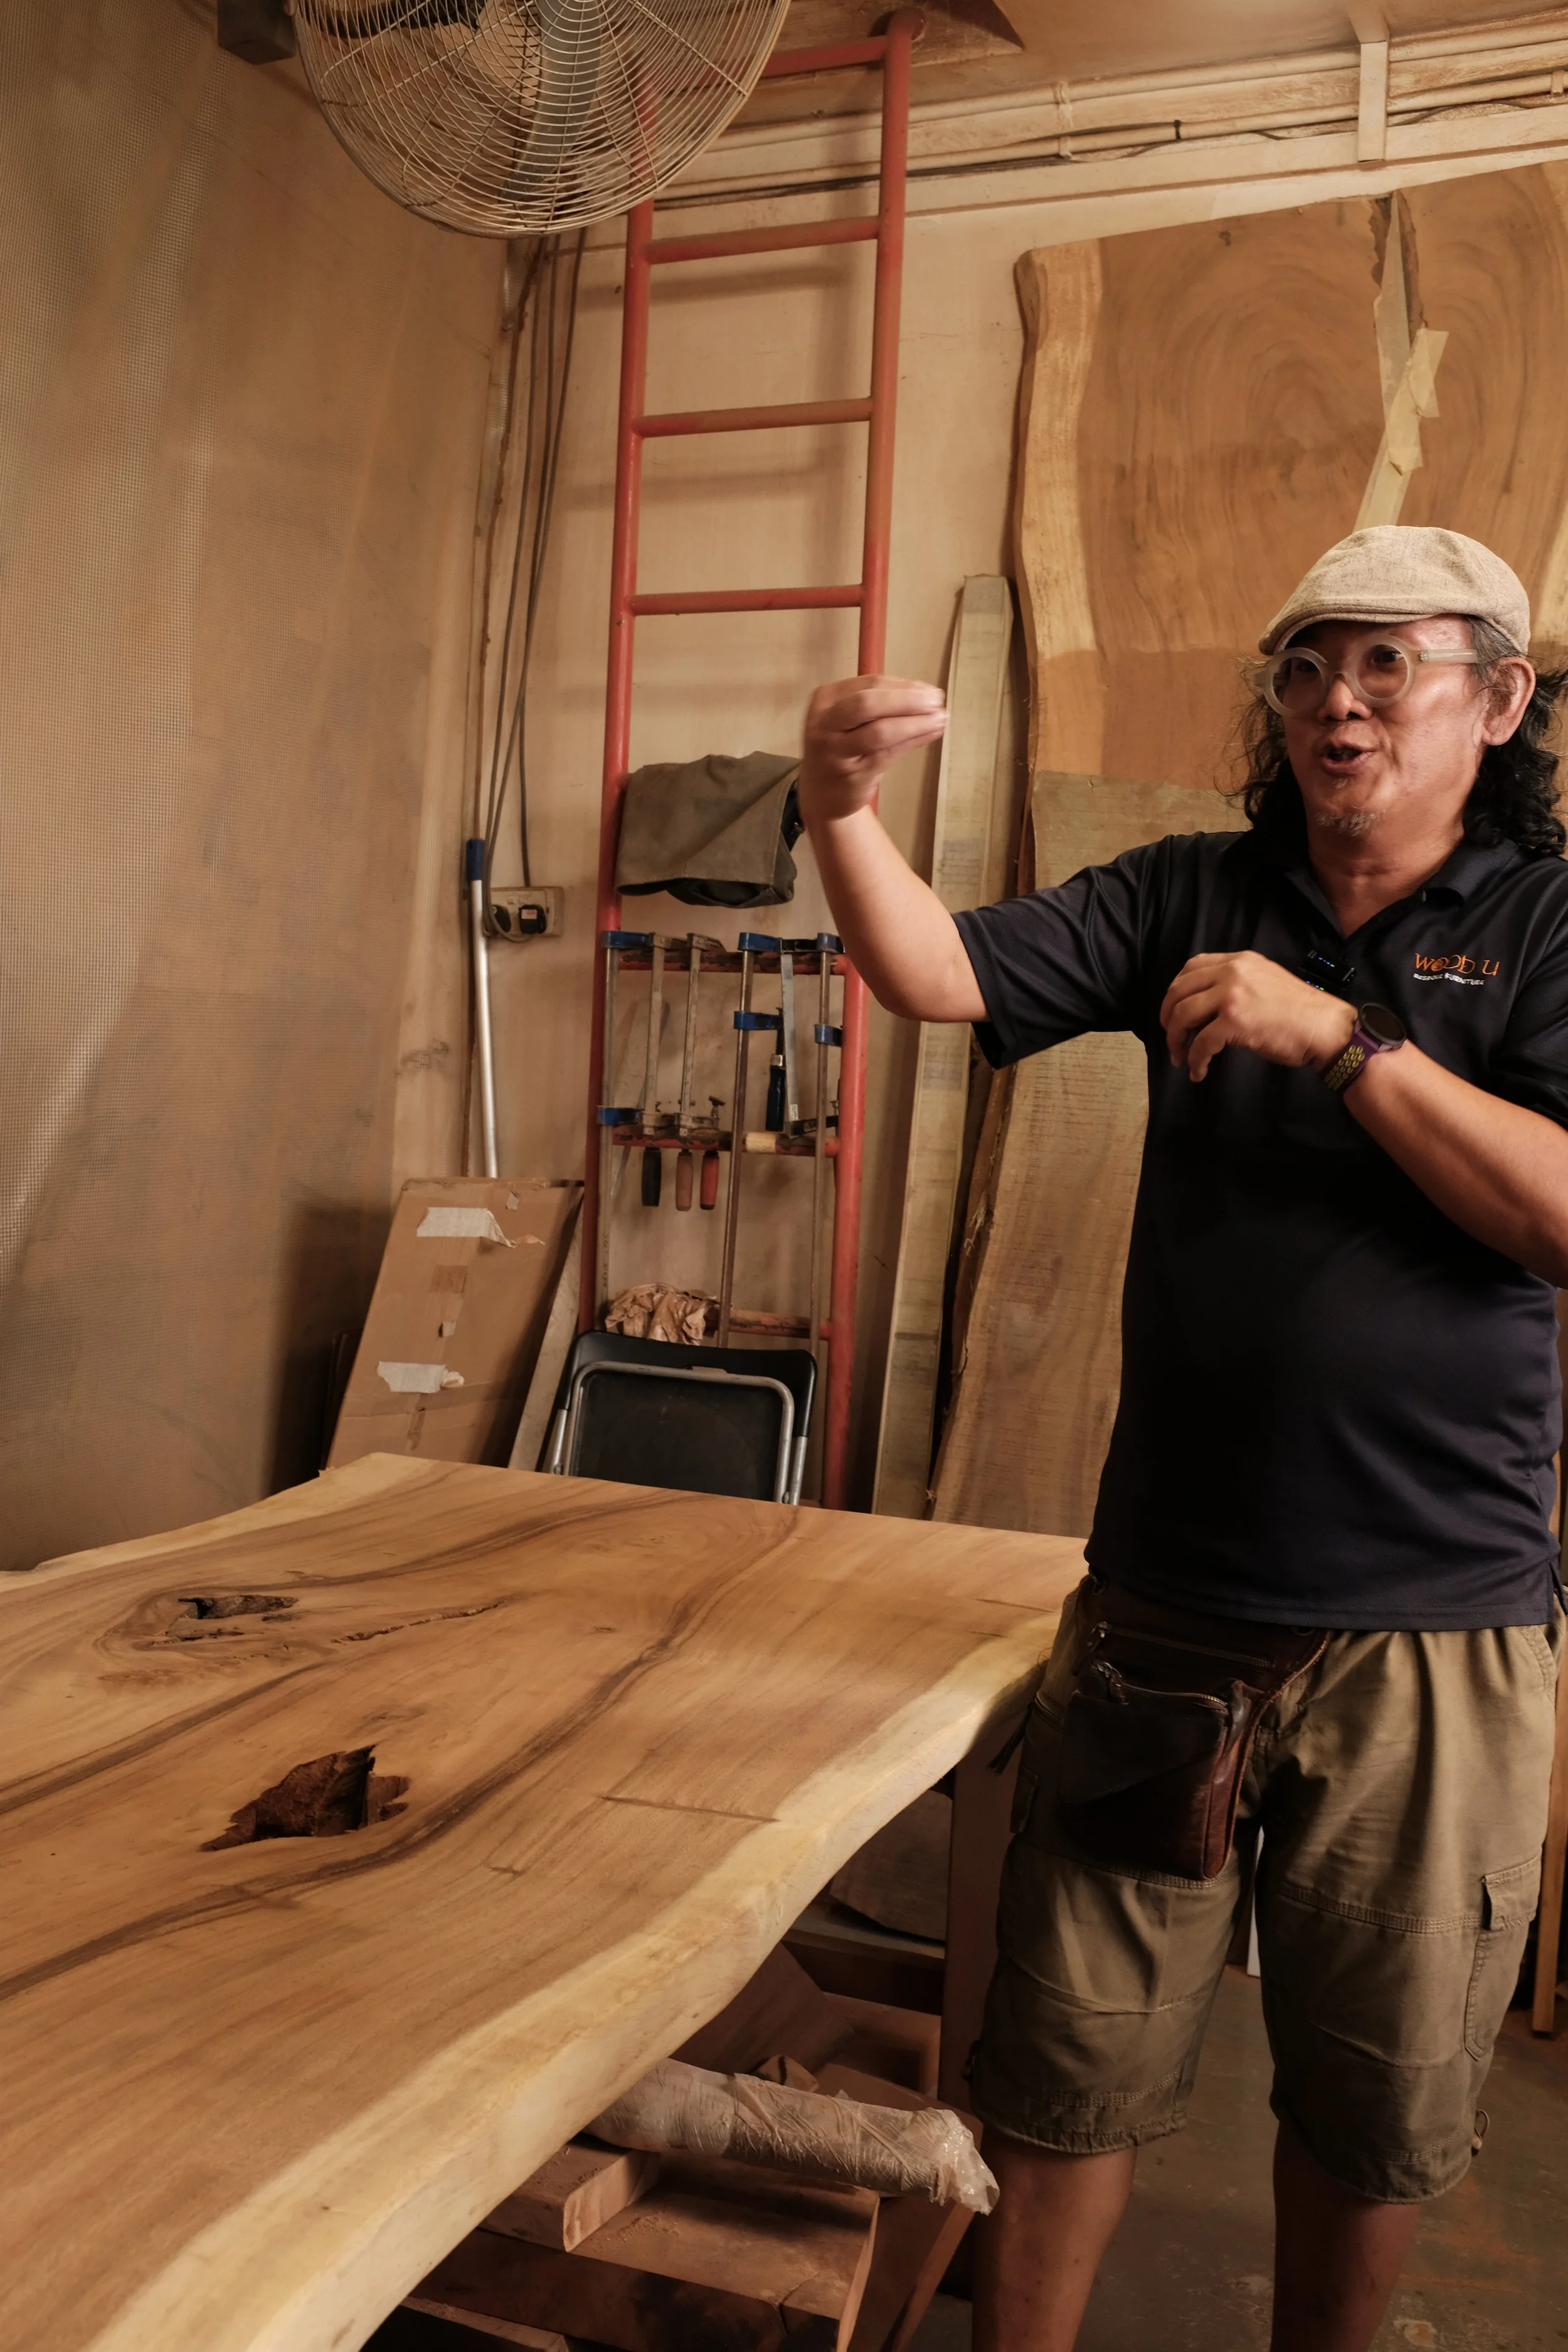
some pictures i’d snapped during the tour at Art of Suar Wood
what i loved about the Art of Suar Wood was how they highlighted the open-ended nature of their final product. there were constant reminders of how “every slab of wood is different”, and that it was dependent on what you wanted in your home. there’s no “standard build”. beauty is really in the eye of the beholder.
the tour at the Art of Suar Wood was also the first instance where i saw the complexity of wood — that it is still living and breathing after it has been felled. but i also wanted to understand how it give it a second life after it has been felled.
the set up
with that, i asked Meng Hong if he had any workshops. thought that i could start with something small. to which, Meng Hong mentioned how he doesn’t do these “short” workshops. he found that a workshop wouldn’t do justice to the whole process of making and creating a table from scratch. indeed, there’s only so much you can complete in a 4 hour workshop. and i doubt that that short timeframe would allow me to learn what i wanted about the tools, the material, and the making.
so, go big or go home. i suggested to Meng Hong that i’d come in every weekend to work on a coffee table. it seemed small enough to be beginner friendly, but big enough to encompass the multitude of lessons that would come with woodworking. thankfully, Meng Hong agreed and gave me the opportunity to work out of his workshop (biggggg thank you!)
why do it?
1. making things & understanding them
i’ve always loved understanding how things are put together. it might look simple, but there’s always so much thought and consideration put into the sheer act of making.
in my previous job, i had worked mostly with build-to-print/ fabricated parts, that is, customized parts. i’d dealt with screws, nuts, bolts, hinges, etc. but wood was a new medium that i hadn’t experienced before. i didn’t know anything about joining wood, and if it was any different from working with metal parts.
personally, it was a knowledge gap that i wanted to fill. what better way to fill it than to do it myself?
2. slow furniture vs fast furniture
there’s fast fashion, and there’s fast furniture (psssst, IKEA). from the time-cost-effort-quality scale, it seems counter intuitive to make your own table: high effort, takes a long time, and good materials are expensive. well, at least i can guarantee the quality of the table.
with fast furniture, we expect everything to be manufactured to a tee. the machines did it — it would minimally be within the upper/lower limits of the product’s specifications. it’s controlled and standardized.
but with slow furniture, anything (and everything) will happen — ugh, murphy’s law. yet, it’s exactly these imperfections that make slow furniture, slow. these features become a story to tell. it makes it uniquely yours.
what do what i want my piece to be? i asked myself this question several times. at the end of the day, it boils down to (1) its function/ fitting in the space, (2) my emotional attachment to it, (3) its quality. somehow, making it was my answer to all three points.
3. it’s free therapy
there’s a lot of woo woo stuff about flow state. but i think it’s different when you actually find the flow state for yourself. time passes quickly when i’m working with my hands. it’s therapeutic in a way where there’s inner peace, full concentration on the work, and just sheer enjoyment of the process. i thoroughly enjoyed every weekend (admittedly, some were tougher than others).
the process (technicalities)
woodworking is technical. i hope to pen down how the table was actually processed. it’s going to be technical, or so i hope.
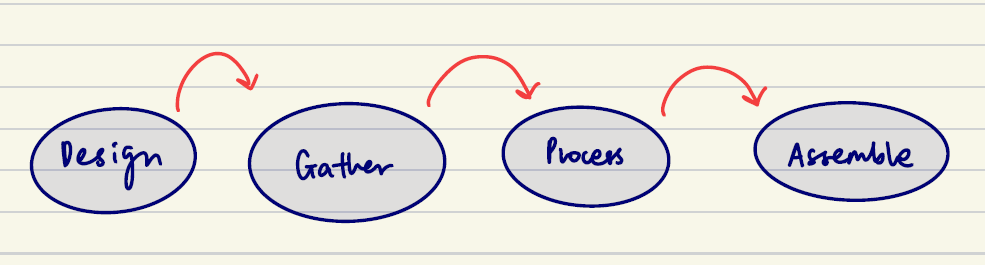
here’s a highly simplified version of what actually happened in the 55 hours of work, put in a flowchart (i can’t seem to stray away from flowcharts and mind maps, my mind just works this way, please bear with me).
design
there are two fundamental questions here:
1. what do you need your furniture to do?
need is a different from want —> need precedes want!
i often look at function before aesthetic, but if aesthetic is your function (i.e. it is what you live for), then of course it should carry as much weight
2. what do you like?
this is where aesthetic preferences come in
maybe you like curves, maybe you like straight edges, maybe you like color
yet again, beauty is in the eye of the beholder. there is no right or wrong here.
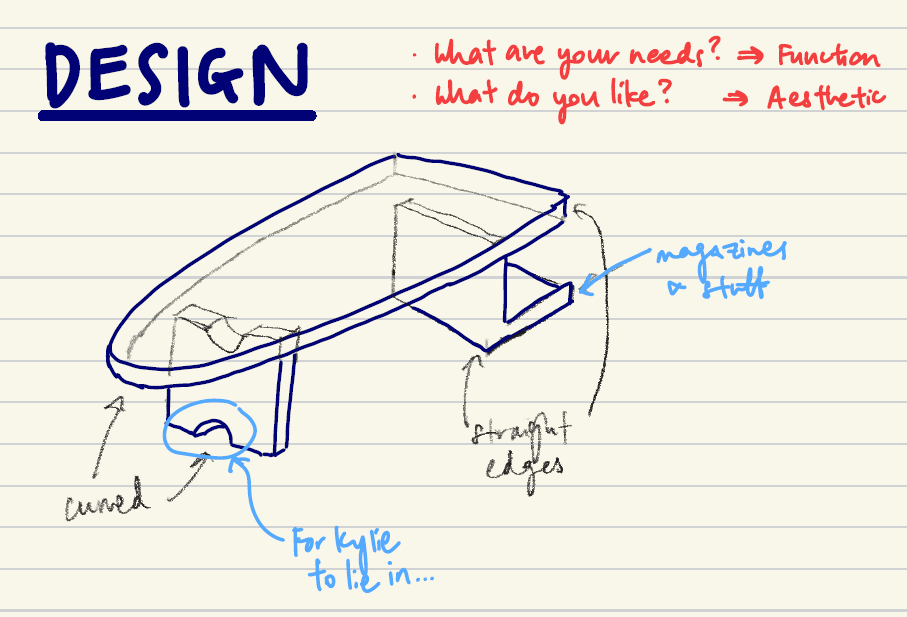
notes on my design
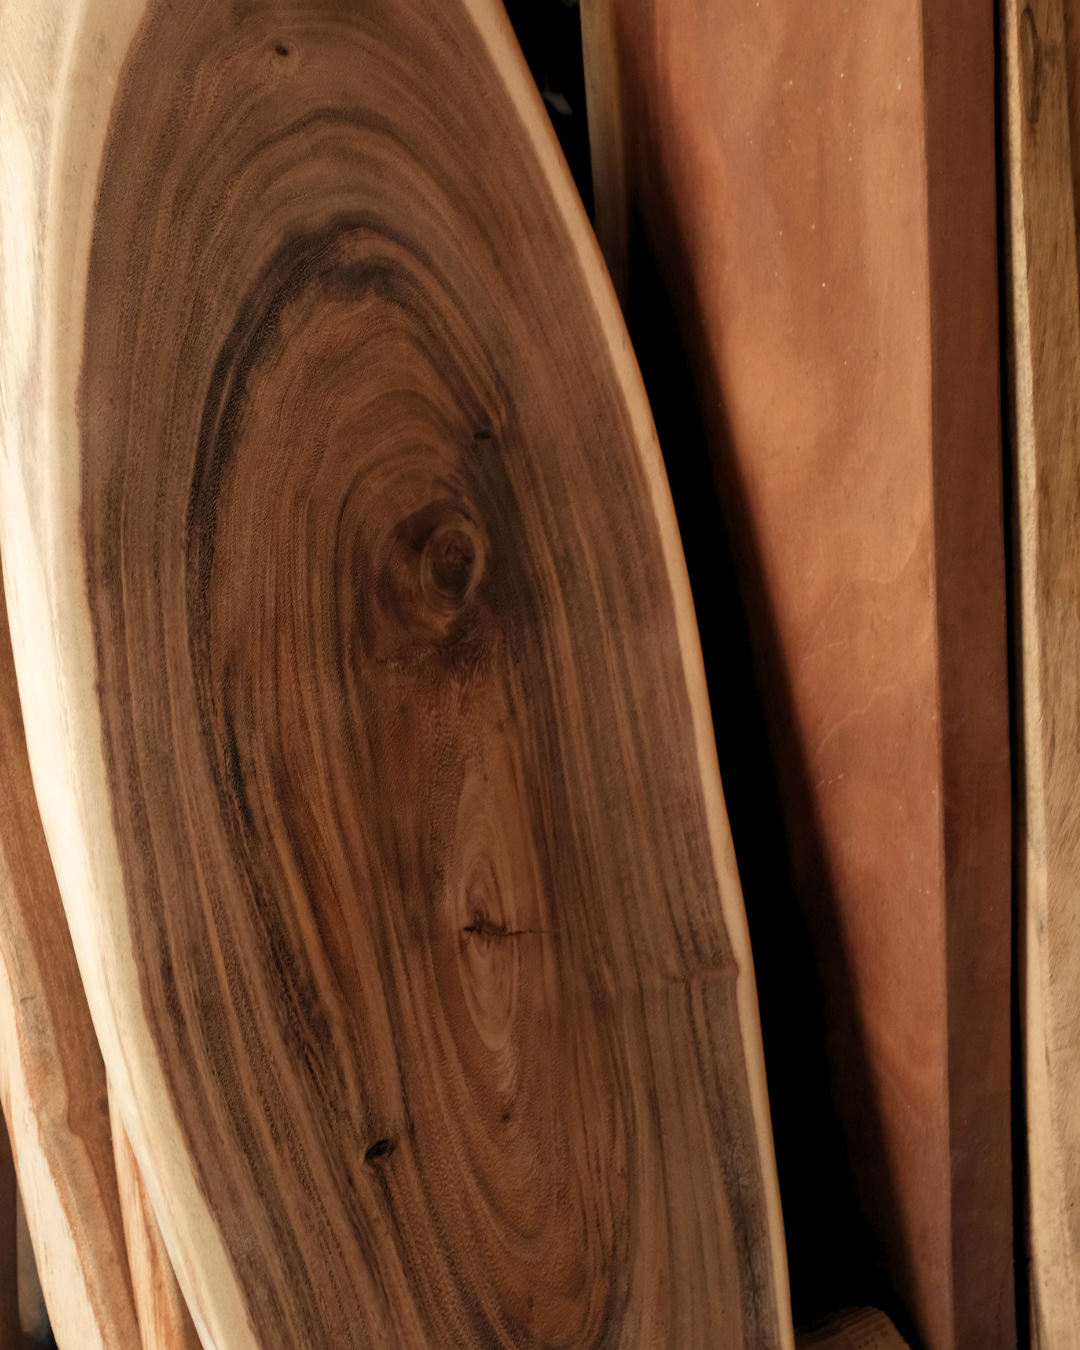
the original slab came looking like a surfboard (i kid you not, look at the picture below!!!). honestly, i scrolled pinterest for a while, trying to seek inspiration as to what my table should look like. i gave up after a few days, and decided to retain the surfboard-looking slab. how many people have a surfboard-looking slab anyway?
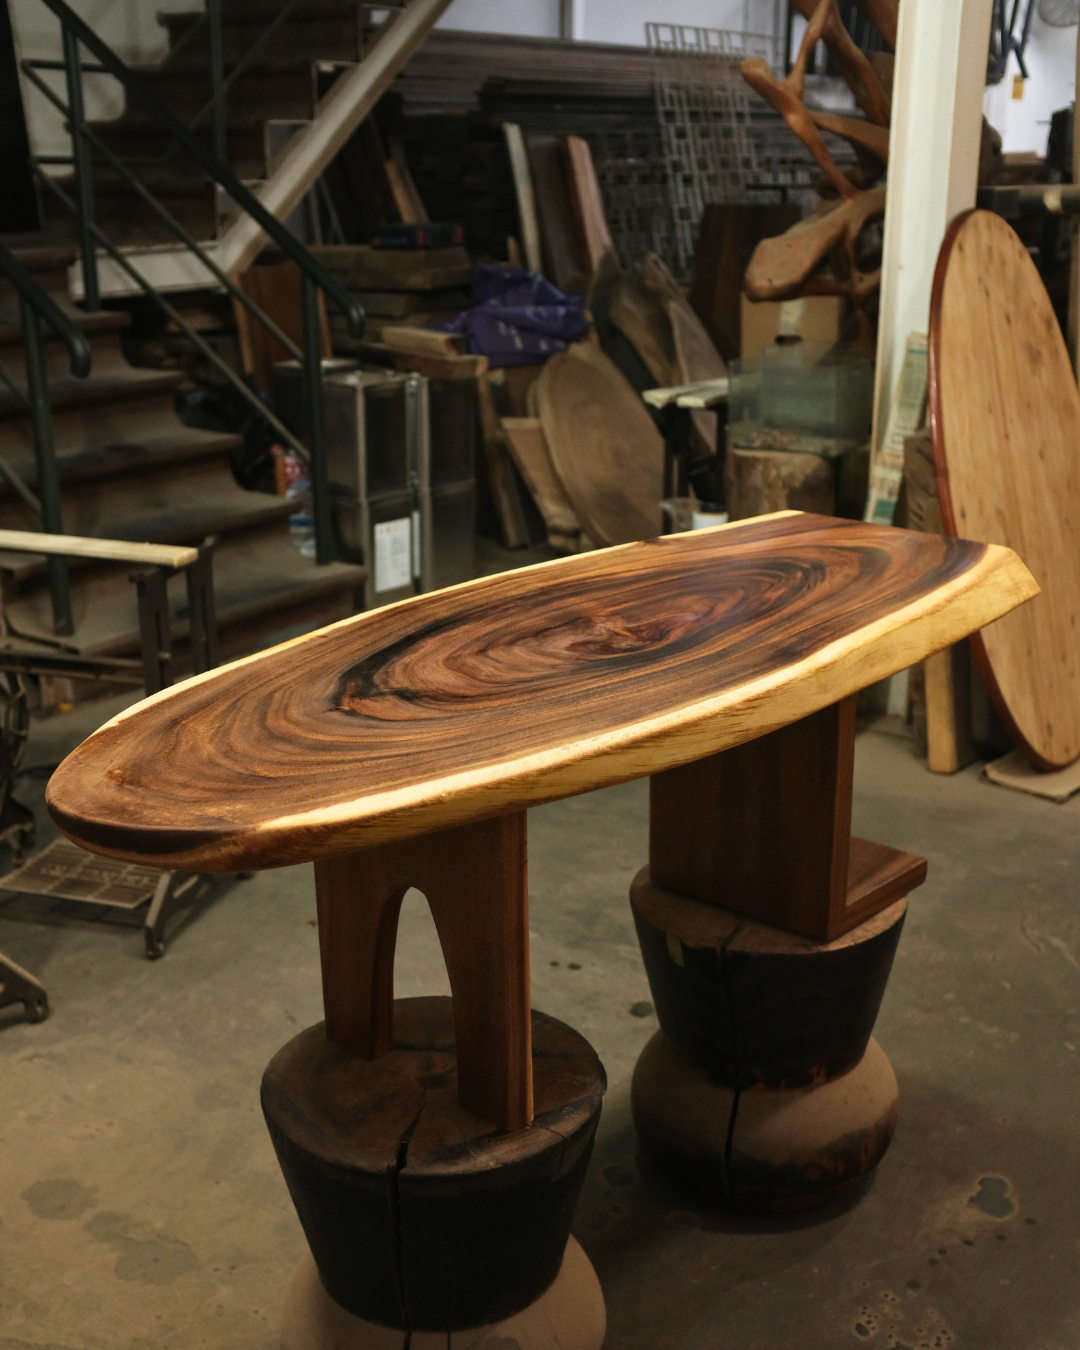
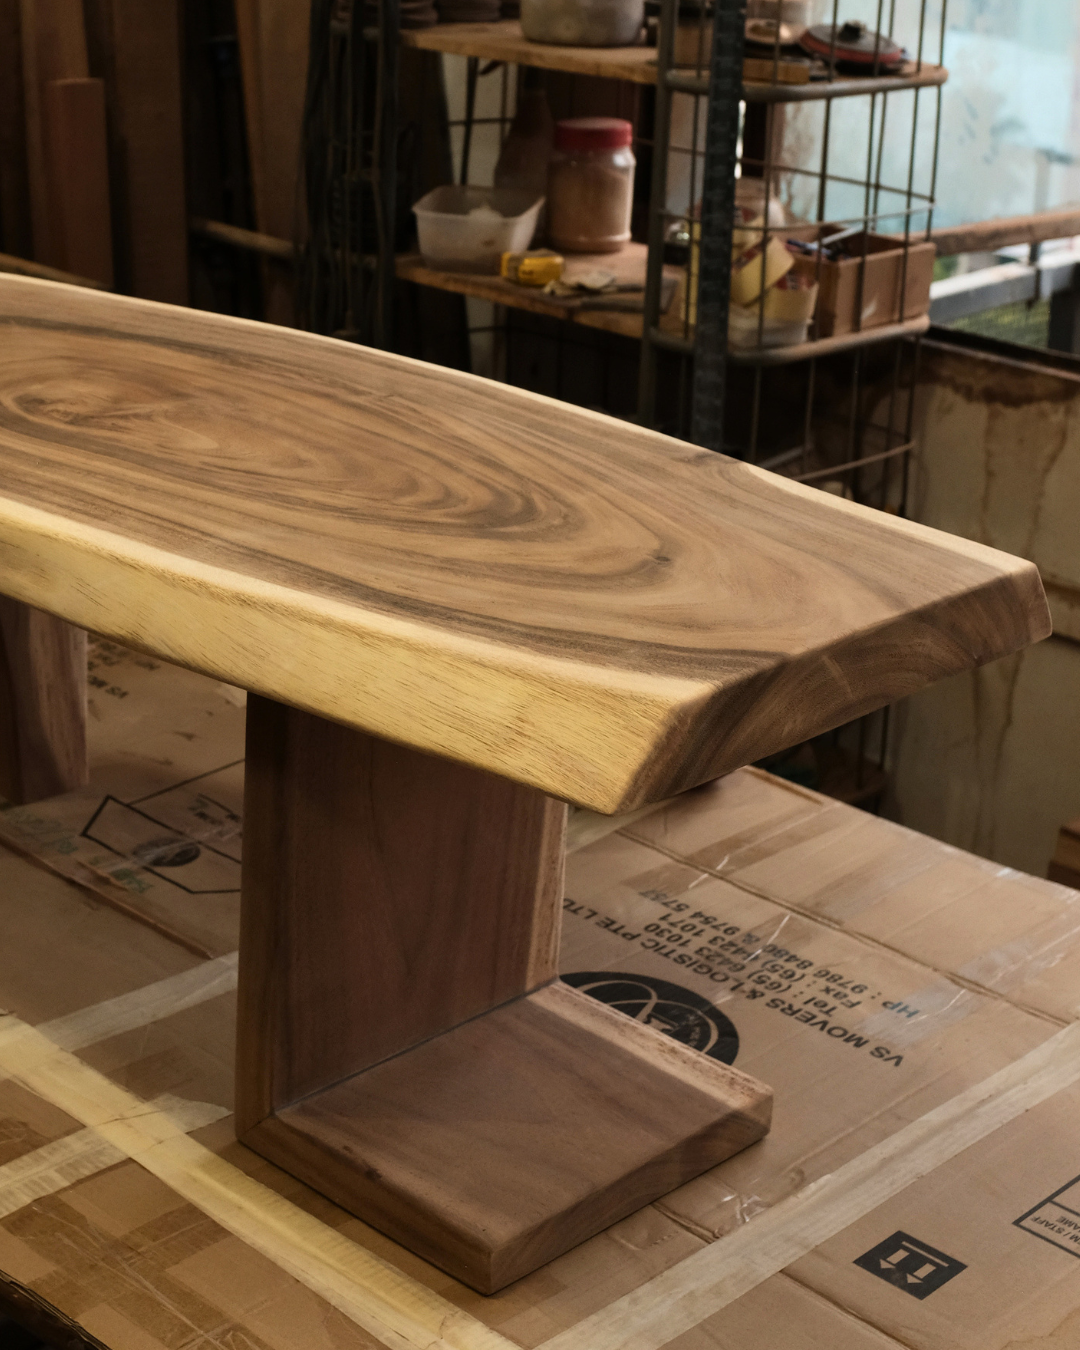
there was a neat contrast between the two sides of the slab — one side was nicely curved, while the other was a straight edge. hence, the legs were to reflect that kind of asymmetry. i paired the “curved” leg with the curved side of the slab, while the L-shaped angled leg was to be paired with the straight edge of the slab.
functionally, my dog loves to squeeze in tight corners/holes… so i left a little gap for her to put her head through. the other L-shaped ledge is a space for my books and magazines.
gather
this stage would be the gathering of tools and materials. nothing much to elaborate on. but i think it’ll be a greater hassle if i didn’t know what tools i should be using — working at The Art of Suar Wood’s workshop made this step soooooo much easier.
process
alright, this is the lengthy part. whenever you have a big problem, step one is to break it down into smaller problems. in this case, smaller components. i think better when writing (physically), herein are my notes attached.
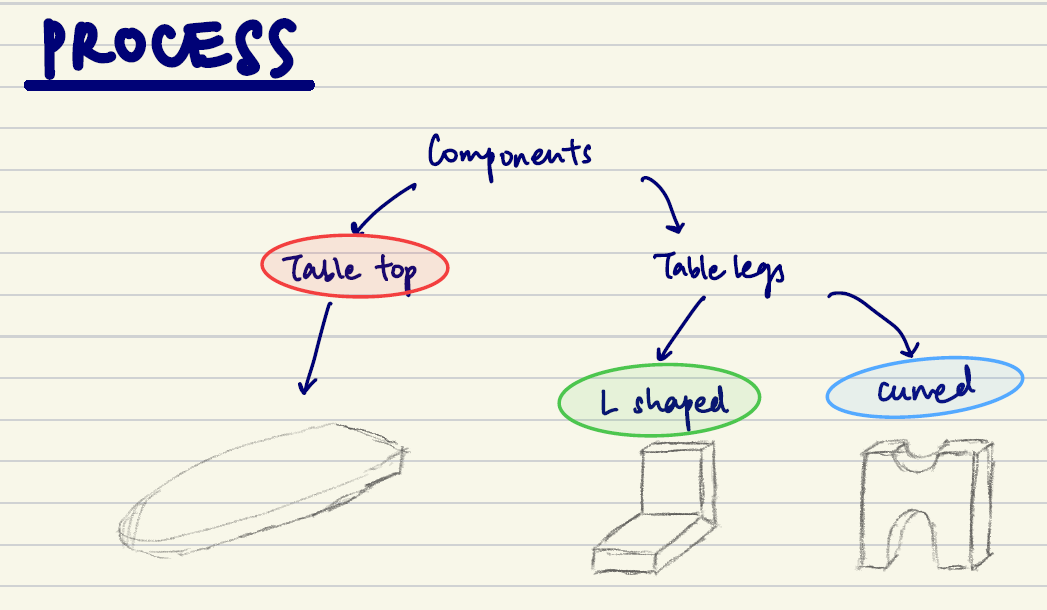
1. the table top
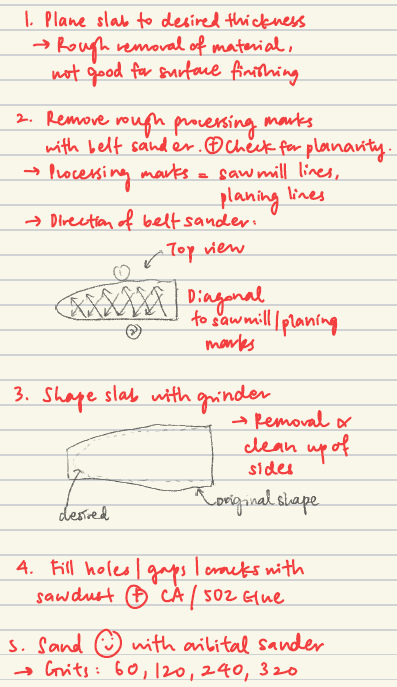
i took 3 sessions to process the table top. objectively, it should have been 1.5 sessions. naur!
spent a lot of time over-processing the table, thinking that it had to be perfect at that step. spoiler alert: it doesn’t. just need to get it to a 70-80% stage, because the final clean up comes in a later stage.
but lessons were learnt and that’s how we get better too.
all that being said, tools used here:
planer
belt sander
grinder
orbital sander
spirit level
grinding excess material and shaping the table was really fun.
2. table legs — L-shaped
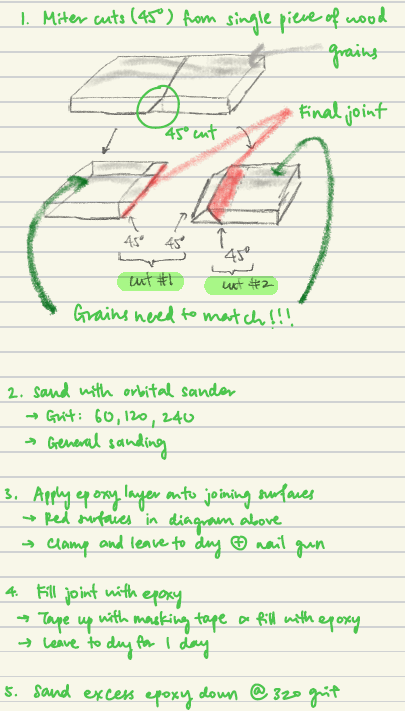
i made a mistake here — thought that i could get away with 1 x miter cut, and mate the two surfaces of the single plank together. after all, it’ll definitely be a matching surface if they were cut from the same piece.
the mistake was that the grains wouldn’t match if i just flipped the second piece in that manner. the final L-shaped leg would then look mismatched. hence, i had to make a second cut (see diagram), which will then allow for the continuous grain on the piece.
we’d filled the joint with epoxy, since the surfaces were not exactly a full match. the excess epoxy was then sanded away.
this, was not so fun. frustrating, even. but that’s the joy of woodworking. make mistakes, learn fast, move on.
3. table legs — curved
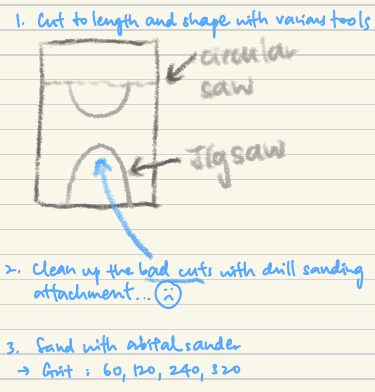
this was probably the most straightforward part. minus the part where i didn’t use the jigsaw in the most optimal manner. ended up with some bad cuts that required cleaning up.
could have cut smaller blocks of wood out with the jigsaw, especially if the turning angle of the shape is sharp (and that the jigsaw has a specific turning radius when handling too).
assemble
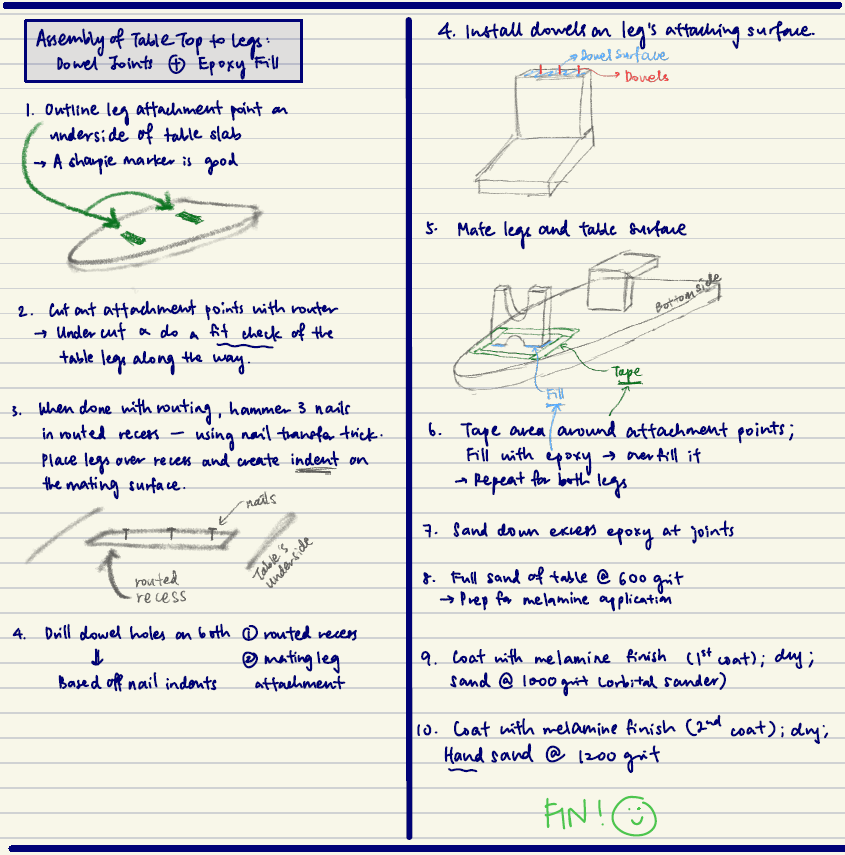
the assembly was lengthy, but was thoroughly fulfilling. the pieces were coming together and i was almost done!
learnt to use the router, did the nail transfer trick to install dowel pins (though i think there should have been a better method), and tried my hand at spraying melamine finish. detailed notes above but i shan’t delve too much into it : )
the final piece
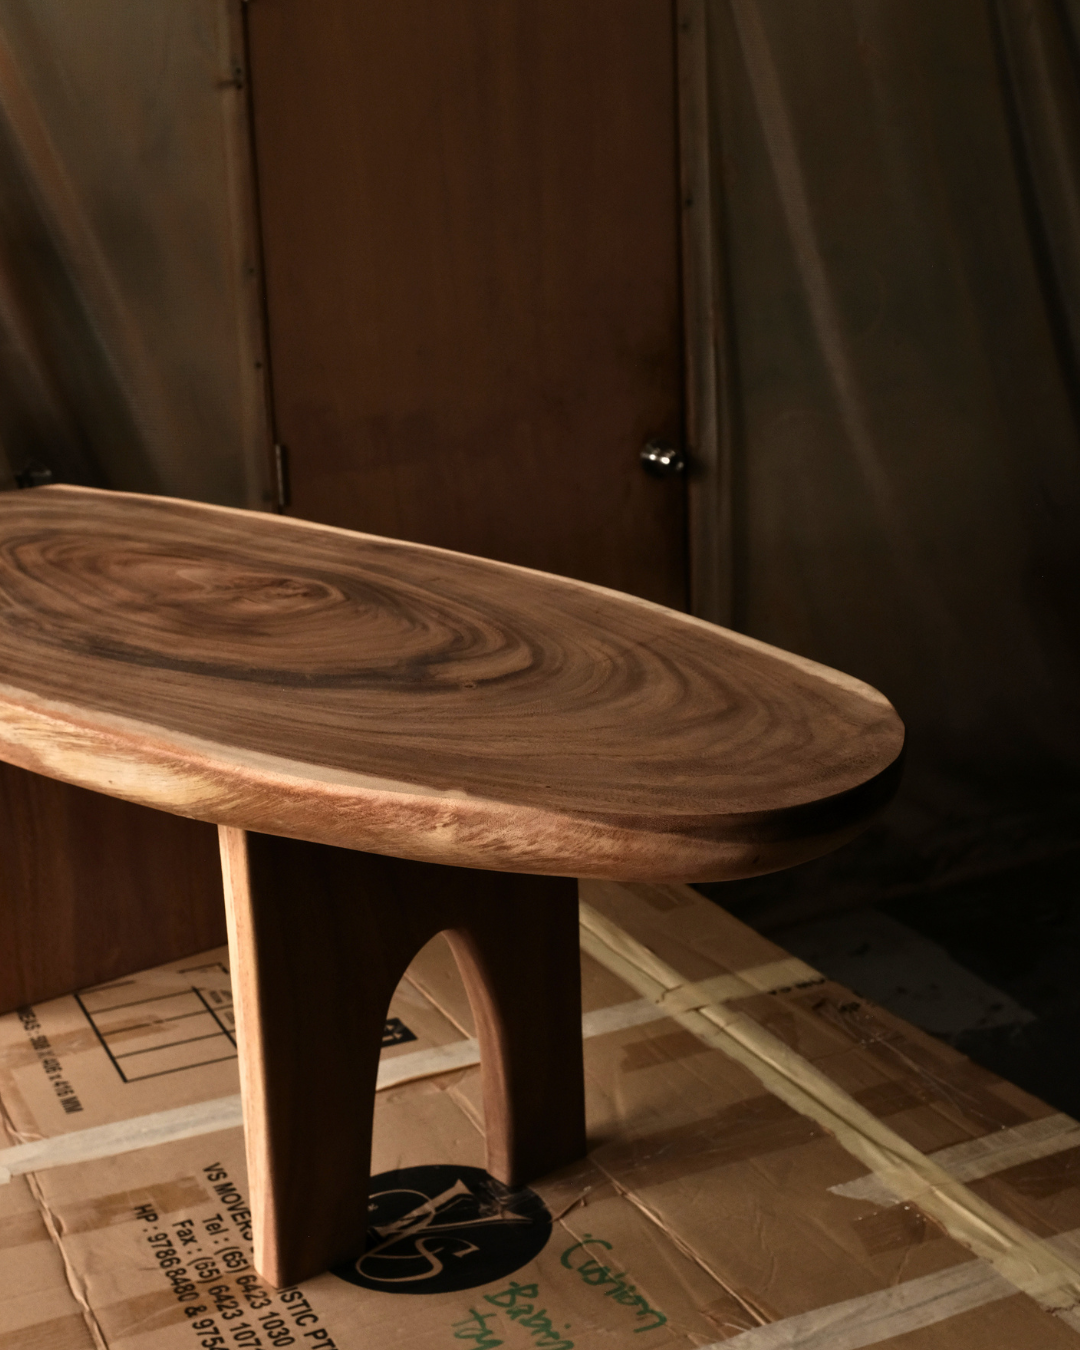
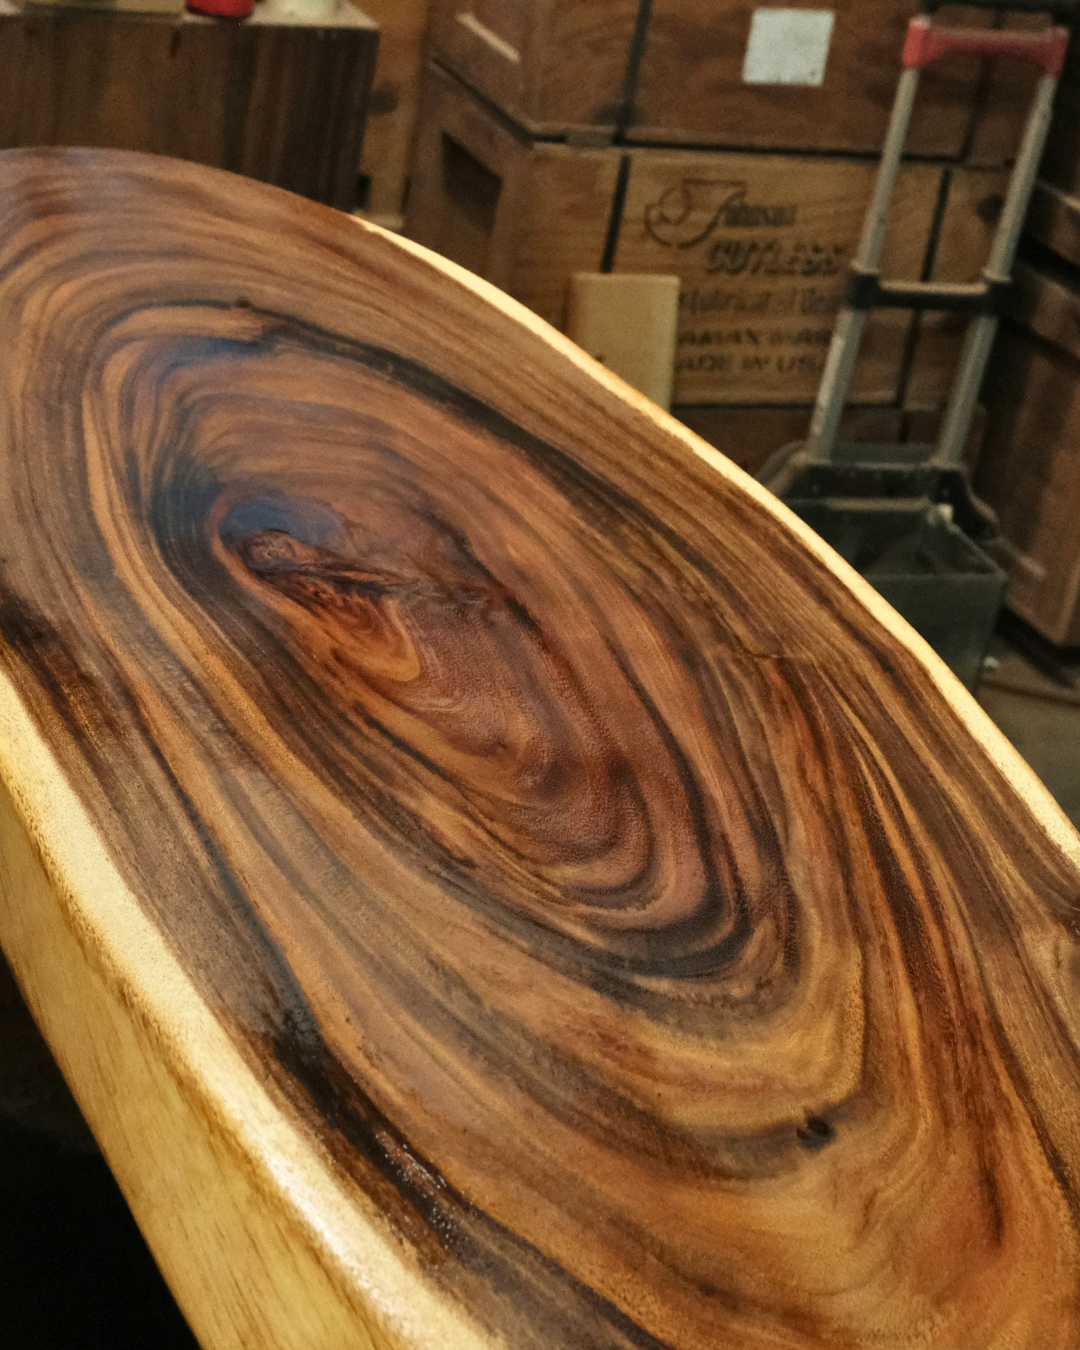
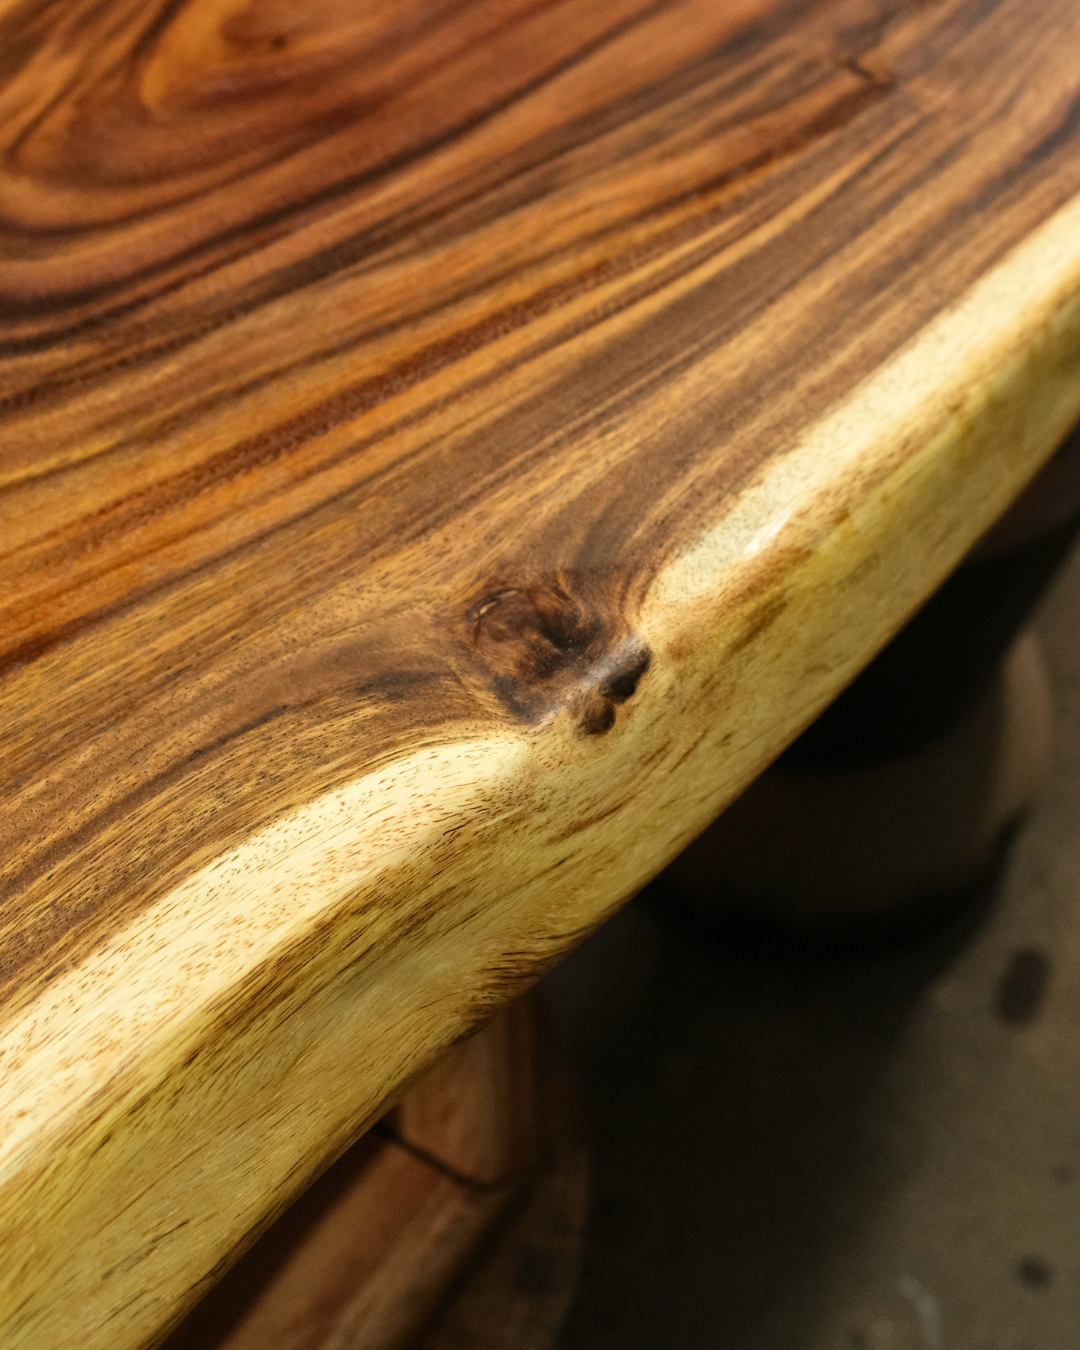
here are some pictures of the final piece! you can find more pictures and reels on my instagram : )
reflections / lessons learnt
i could probably list 200000 lessons from this single build. but here are 4 so that i don’t come off as long winded (ha ha).
1. just do it
i’d wanted to learn how to woodwork for the longest time. but it was always so intimidating. i think the largest obstacle to overcome was obviously the safety aspect — with all these tools and equipment, how could i learn how to do this without losing a limb/ killing myself?
safety is a legit concern. but it was nicely mitigated when working in a controlled environment. in this case, i was lucky enough to find a workshop that had experienced woodworkers to guide me along.
my only wish was that i had done this earlier. wayyyyy earlier. ask more stupid questions, knock on more doors. the obstacle will be overcome.
2. showing up
in between work, the gym, life, and what not, there were some weeks that i struggled to show up. this hindered progress significantly. the table took a lot longer than i had expected.
all that being said, even for the days that were sweltering hot and my body was in shambles, i made the treacherous 30 minute drive to the north of singapore (and for those who live here, it really is ridiculously far from the rest of the country). i’d tell myself to just complete up to an internal check point, and call it a day — this was really difficult for the maximizer in me, where i always believe in a 100% effort in every session, else i wouldn’t start at all.
yet, for a build required weeks, and not bursts, of effort, showing up every week was essential. progress was incremental, but every little bit counts.
3. missteps and moving on
“if you fail to plan, you plan to fail”. this is something that’s always at the back of my mind.
as an (over) planner, i wanted to have a clear plan before starting on the build. think of gantt charts and objectives. but, my knowledge gap made the plan fuzzy. it is difficult to plan fully when you don’t even know what’s next.
the thing about learning craftwork is that it’s not theoretical — you gotta learn by doing. this is something that i’m still getting used to. no amount of reading up and planning is going to make the physical work happen. you just gotta do it.
and while you’re doing it, there will be missteps. things that don’t go your way/ as intended. it is important to look at these missteps as redirection, and as learning points — no matter how frustrating it gets. maybe it’s called trial by fire, maybe it’s called fail fast and move on. anyway, just do it!
4. do what you will
after woodworking for the past few months, there’s no “right answer”. people make things up as they go. this is not examinations with “standard answers”, or even a standard approach to things. yes, you can craft your own internal processes if you were doing something repeatedly. but if it’s something new, we are all making do.
so do what you will. if it makes sense to you, try it out. maybe it’ll work, maybe it won’t. and if it doesn’t work, what really helped me (personally) was the humility to understand how other people approach it, and asking a lot of stupid questions.
it’ll work out. the build will eventually come together.
big thanks
biggest thanks goes to the team at The Art of Suar Wood — Meng Hong, Noaby, and Saiful. the patience that they have shown me is unparalleled. from teaching me how to operate every tool, to the company every saturday in the small workshop, it’s been a great pleasure to work alongside them. indeed, these are things that a 3 hour workshop wouldn’t have been able to impart.
what’s next?
for now, i’m looking forward to growing with this table. to see how the patina on the wood develops with time. and of course, to enjoy the presence of this table that i can gladly call my own.
many ideas are brewing in my mind, and i can’t wait to start on my next project with wood : ) till then, i’ll keep making and exploring.
after all… tinker with things, right?
(side note: am happy to take any projects if anybody needs a custom build too, just drop me a holler at my email/ socials!)
thanks for reading till here ;)
